
Recently I’ve been experimenting with Blender as a tool for 2D illustrations. Using 3D CAD software gives you a lot for “free”. Incorporating 3D art tools into your 2D workflow, you will benefit from the strengths of 3D and can significantly speed up your 2D process.
Benefits of 3D tools that you can’t get with 2D tools
- You can easily play around with camera position in real-time.
- You can easily play around with lighting in real-time.
- 3D forms can be duplicated and manipulated easily to create multiples with perfect perspective aligned to your camera.
The Process
- Thumbnail sketches.
- 3D mockup in Blender /tool of choice.
- Paint over render using your favourite 2D Illustration software.
Thumbnails step
Create your thumbnail sketches for your illustration. This is an important stage to bring life, energy and story into your composition. I neglected this stage for the example of this post and it shows. For any freelance illustration you would have some direction, this is where you really need to apply it. You can always adjust things more as you go along but this stage is cheap and has lot of freedom for expression.
Blender step
It is possible to quickly mock up a 3D scene in Blender in a few minutes, using basic geometry for large shapes, sculpting tools and grease pencil for more detailed forms.
Setting up your base scene in 3D gives you an unprecedented level of flexibility. You can change the camera angle to get a different perspective in an instant - this would require a whole new drawing for a 2D-only work. This flexibility means you can make exciting changes and discoveries while you are still playing around with elements of your composition. This flexibility makes Blender a fantastic tool for storyboarding too.
Use Sculpt tools to make characters, simple geometry for blocking out the environment, and Grease Pencil to draw details and create more geometry very quickly, Lights for the main lighting in the illustration. Apply some base colours if you like. Render out at high resolution for paintover.
Paintover step
Paint over using your favourite 2D Illustration software - e.g. Krita (free, open source), Photoshop, Clip Studio Paint (affordable). We can really focus on painting now, since step 2 took care of the compositional elements, perspective and underlying structures, giving us a solid foundation to work with. Here we add all of our textures, details, athmosphere, lighting effects and polish.
Example of the process
Here’s a few images of my experiment throughout the 3d and 2d process. This piece was made from a very quick sculpt while I was actually playing D&D at home using roll20, so that shows how nice it can be as a workflow. As I skipped the thumbnail part here and it shows - there’s very little emotion or story in this peice. I was more focused on how the workflow all fits together.
3D Sculpt
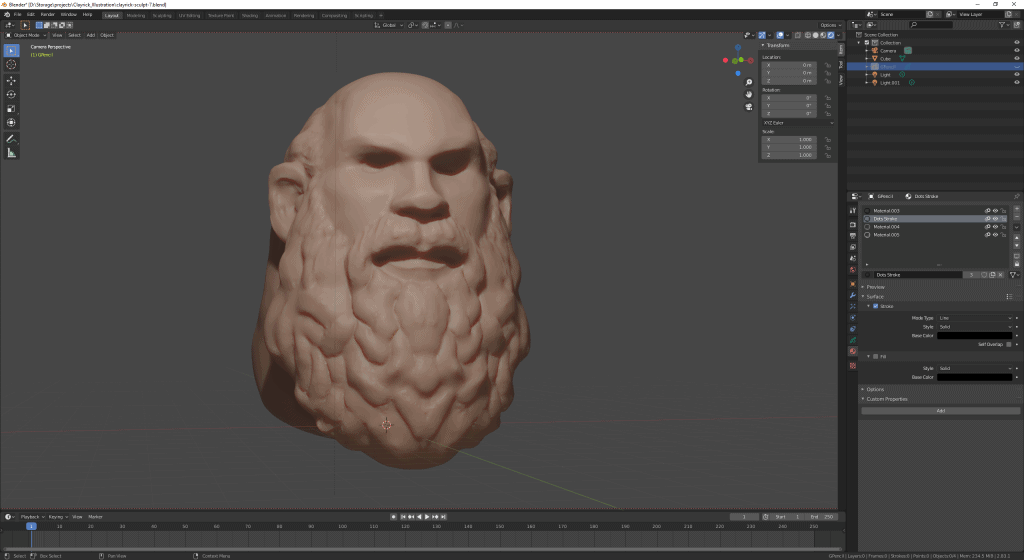
3D Sculpt of Clayrick
Grease Pencil
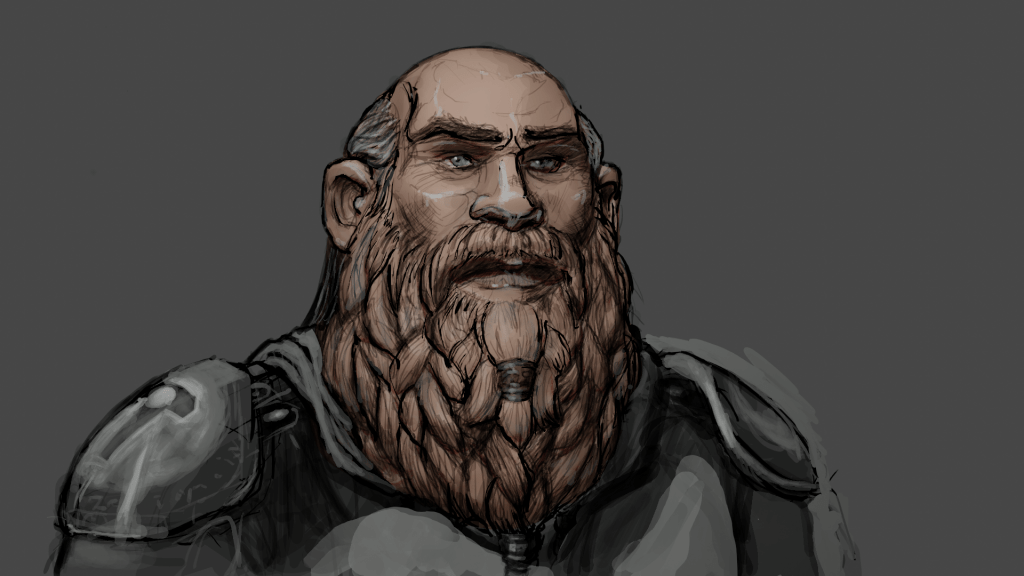
Blender Grease Pencil draw-over on 3D sculpt of Clayrick
The fact that sculpting in 3D gives you a perfect symettrical model is fantastic for humanoid characters, as you can then add their imperfections in the paint and it will feel high quality.
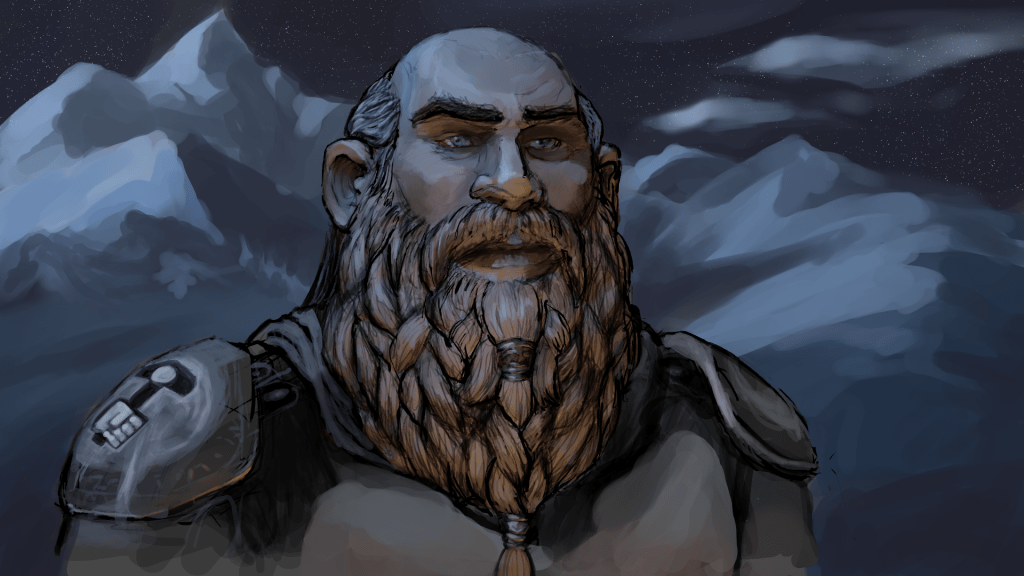
Lighting

Lighting adjustments for a moonlit night scene with some light source like a fire in front.
Paintover to add more details, background
Paintover adding background, shape refinements and details.
In a proper peice you would have blocked out background elements using Blender too. I didn’t here and while it’s always fun to paint mountains, I wasn’t able to get into the same flow as the when detailing the character, since I had to switch back to thinking about space and perspective etc. I didn’t spend much time on it though, since I wanted the attention to be in the foreground anyway.
Polish - adjustments, visual effects, finer details
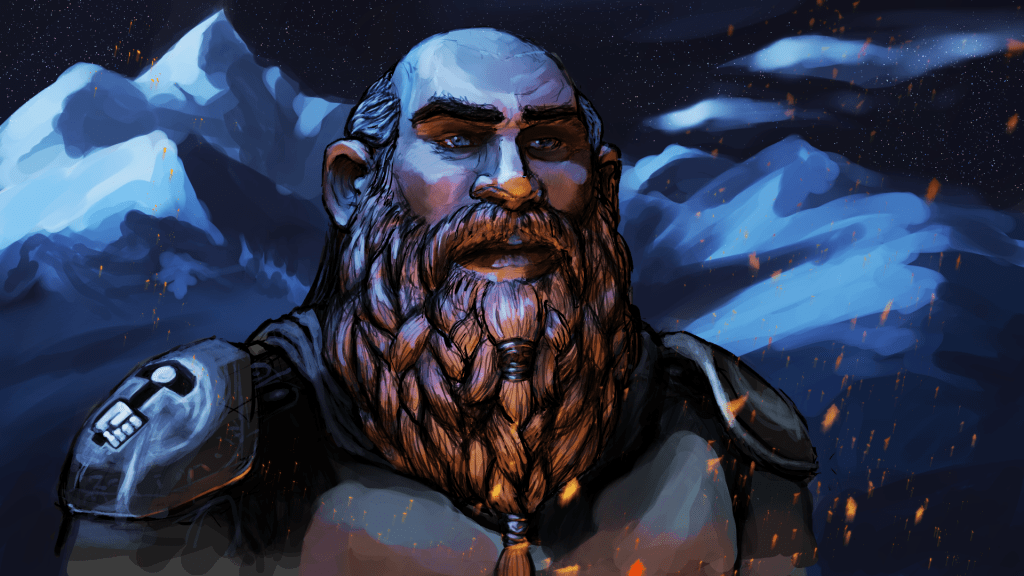
More details, colour adjustment layers and polish.
I really enjoyed this process and will certainly be working in this again. Instead of doing something random I’d like to spend more time planning out the composition using thumbnails and add a lot more emotion to any characters in the scene.
In conclusion
I’m not the first person to use 3D tools for illustrations, there are plenty of folks out there with tutorials on youtube and those who sell tutorials on gumtree. If this intrigues you I urge you to check out those tutorials and give it a blast yourself.
I look forward to producing more artwork using this workflow as I feel it compliments my skillset well, and has a nice seperation from the preparation and construction stage to the details and polishing stage.
You don’t need to use blender, you can use any 3D modelling or 3d sculping tool to make this an effective part of your process.
If you have access to other tools such as ZBrush, 3D Studio Max or Maya, then you can use those as part of a 2D workflow instead of blender. That being said, I encourage 2D artists pick up blender and give it a spin - it’s free, it can run on a toaster, and it could help you improve your craft, your efficiency and your results.